Month: January 2015

Zoya Nail Polish Delight Collection for Spring 2015

Happy Friday! Today I’m excited to bring you a full review of the new Delight Collection from Zoya Nail Polish. This collection contains three creme polishes and three shimmer polishes to help you celebrate the spring season. I am always eager to test out the new Zoyas when they arrive to my doorstep, so let’s jump right into my review!

Zoya Delight Collection | Adventures in Polishland

Zoya – Lillian Zoya – LillianFirst up is Lillian, a pale blue creme polish. Lillian has a good formula, but I did experience some mild streaking. I applied three coats to get a flawless finish, and I really like the result. I’m definitely a sucker for pastel shades, especially in the spring, so Lillian is a great one to have in my collection.

Zoya  – Eden Zoya  – Eden
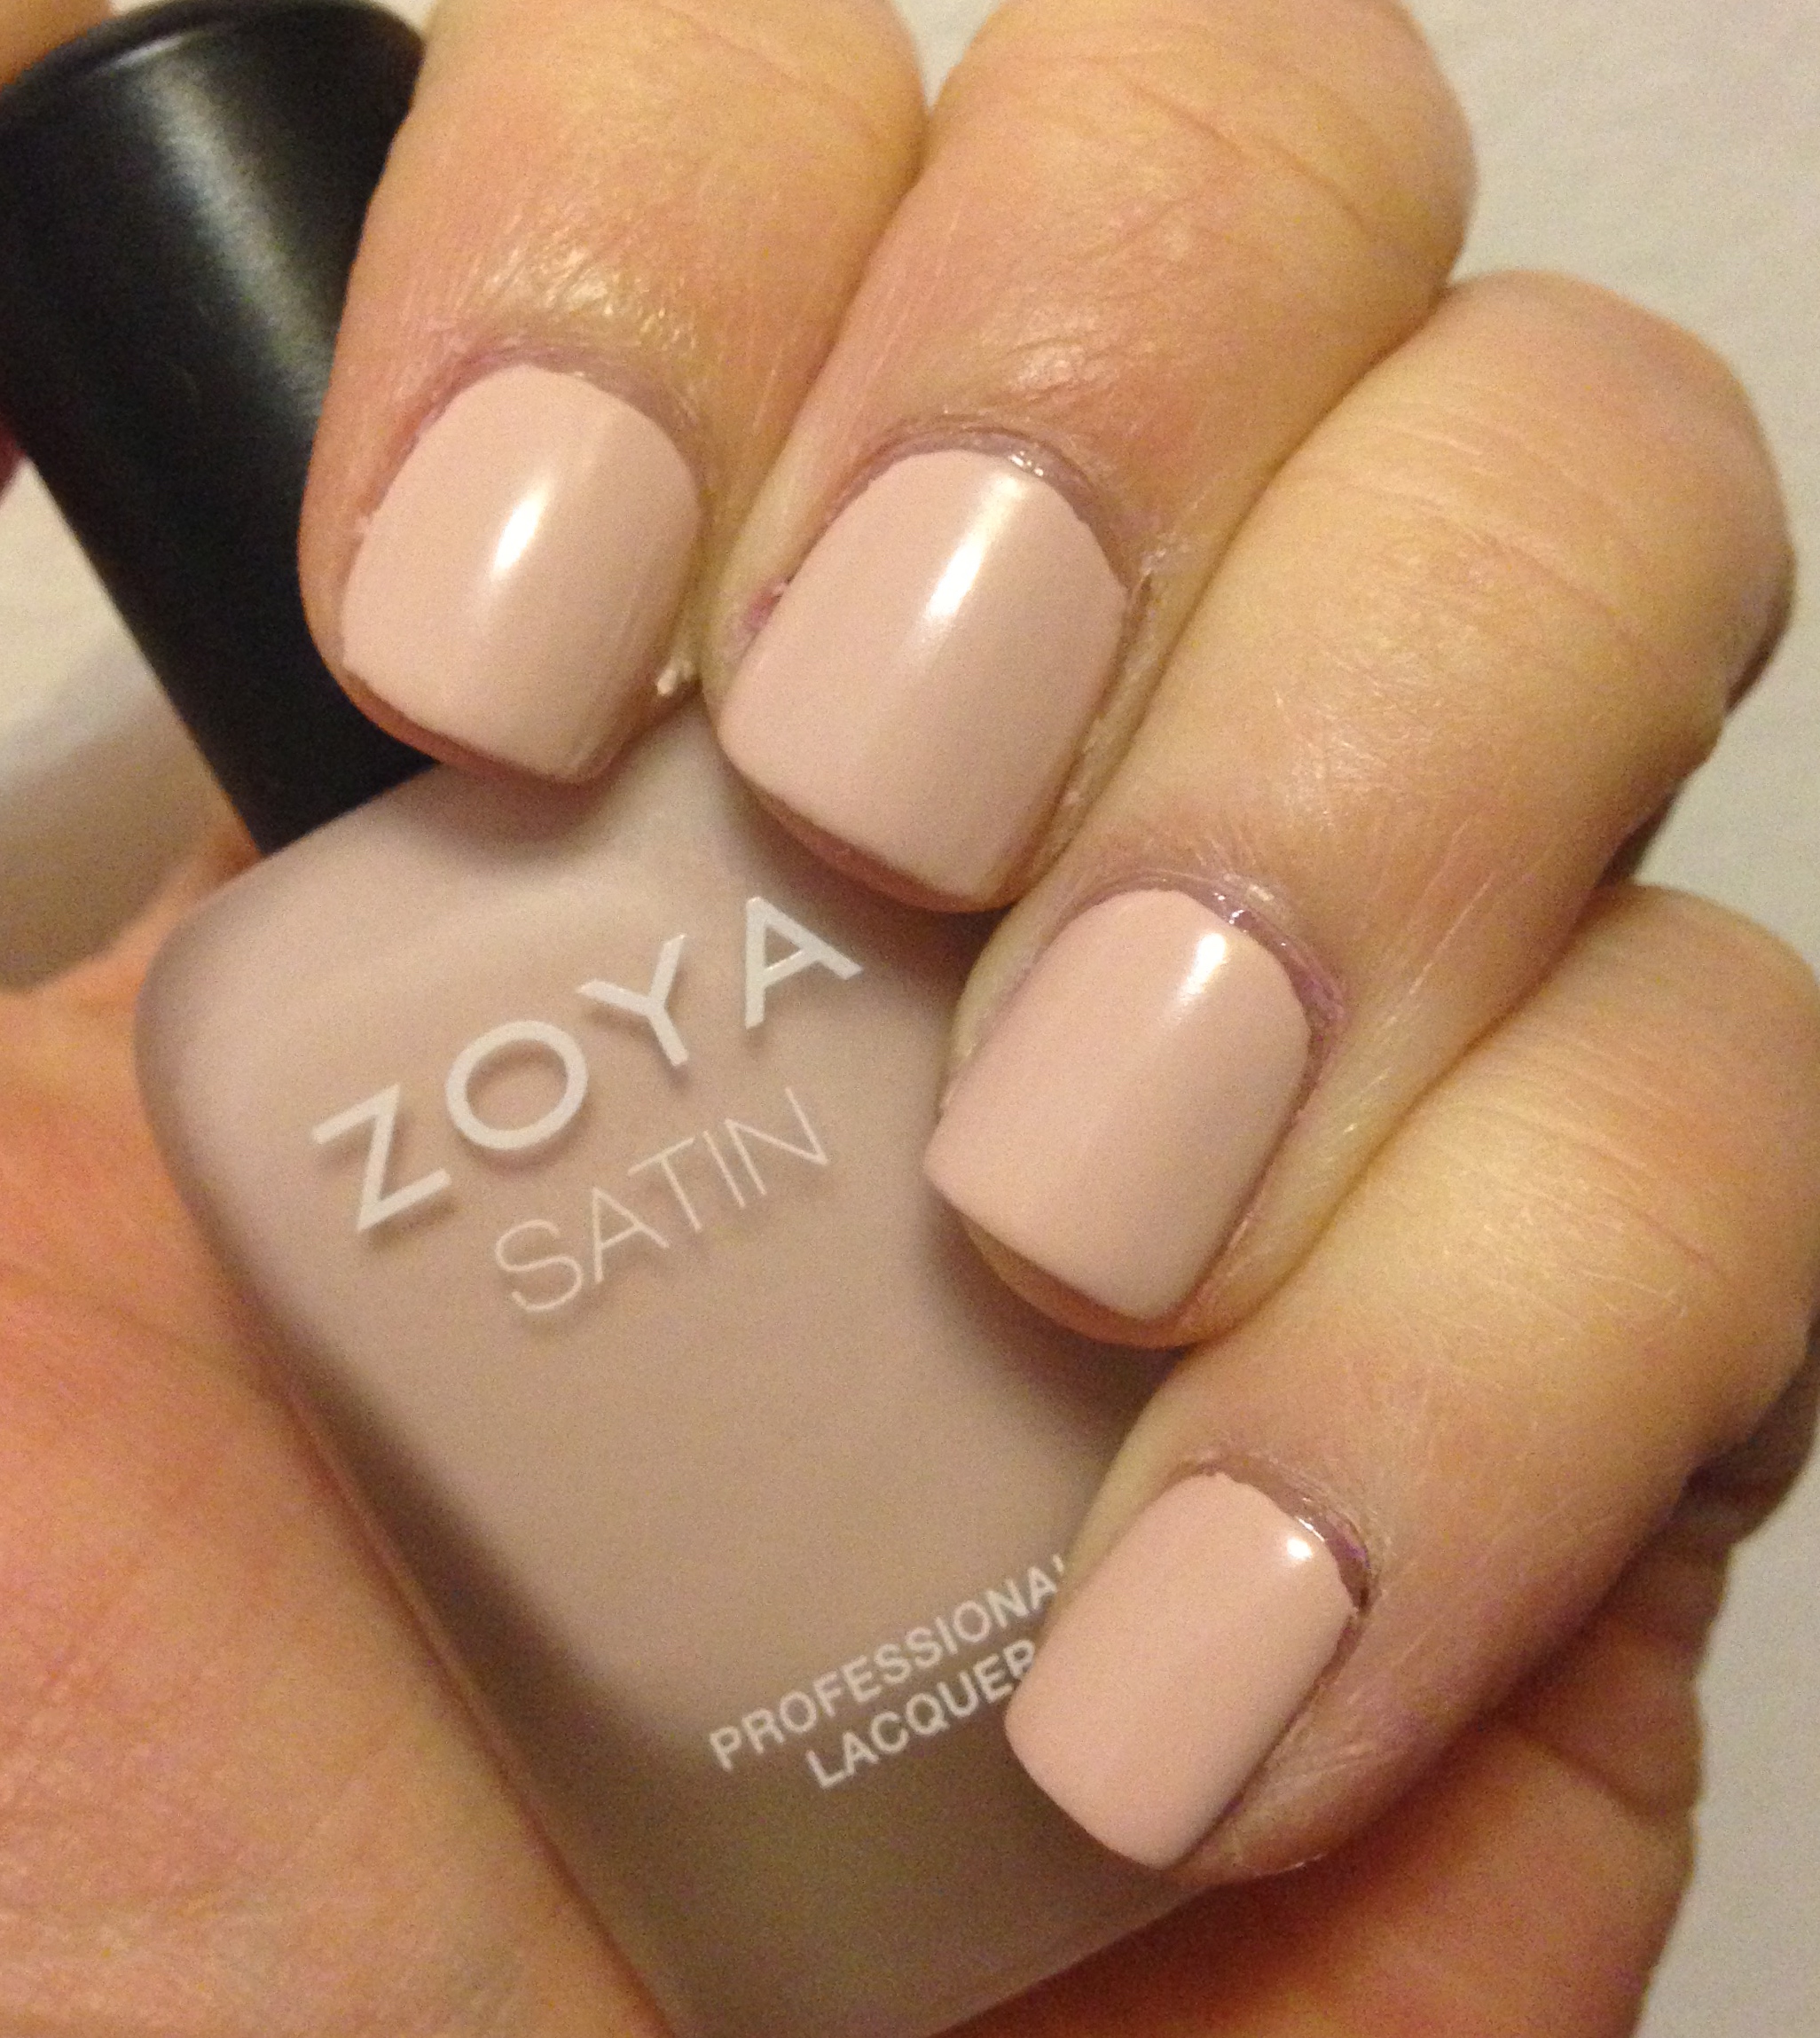
Next up is Eden, a beautiful pink polish that Zoya calls a “spring flower” shade. Eden’s formula is great, and I applied two coats to achieve opacity. It is a bit on the tacky side, so I recommend thicker coats that you allow to dry completely between layers. If you’ve been a follower of mine for a while, you’ll know that I love pinks! Eden is so nice!

Zoya – Tiana Zoya – TianaTiana is the last creme shade in the Delight Collection, and it’s a stunning mint green. Tiana also had a formula that tended to be streaky, so I applied three coats for an even finish. I’m really loving this creme polish. Mint shades are always on trend in the spring, so if you’re looking for one to add to your collection, pick up Tiana!

Zoya – Rayne Zoya – RayneRayne is the first shimmer in the collection, and is a unique metallic blue with turquoise shimmer. Rayne is a bit sheer, but has a great formula. I applied three coats to achieve opacity. At first I didn’t really like how Rayne looked on me, but the more I look at it the more I like it! What do you think?!

Zoya – Daisy Zoya – DaisyMy biggest surprise in the collection is Daisy, a yellow polish with a yellow shimmer. I wasn’t too excited about this one, but when I put it on I was loving it! Daisy has a perfect formula that is opaque in two coats, and the yellow shade looks great with my skin tone. I can’t wait to use it again!

Zoya – Leslie Zoya – LeslieLast but not least is Leslie, a purple polish with a turquoise shimmer. Leslie is my favorite in the line, and has a wonderful formula that is opaque in two coats. I’m drooling over this gorgeous lavender shade. I don’t often wear shimmers every day, but I think Leslie will be an exception!

All in all, the Zoya Delight Collection contains some really fun and unique shades for the spring season! I definitely think Leslie is a must, and would recommend you grab any of the colors that appeal to you. These polishes can be purchased on the Zoya website HERE for $9 each or $54 for the entire set. Please let me know in the comments if you’ll be picking up any of these polishes!

The products in this post were provided for my unbiased review. All opinions are my own. See my Disclosure Policy for more information. 


Manicure Monday | Essie Play Date

Happy Monday! Today I wanted to share with you my current manicure. I’ve been digging through my nail polish stash lately, and discovered an entire box of purples that I haven’t seen in a long time (yes….a whole box!). I looked through that box and decided to go with one of my old favorites. Let me show you Essie Play Date!

Essie – Play Date Essie – Play DatePlay Date is a stunning purple creme polish in the lilac and lavender color family. It is opaque in two coats, and has a perfect formula. I think Play Date looks amazing with my skin tone, but I bet it would look great on anyone! I did follow up with a coat of Essie’s Good to Go top coat for some added shine, and because I want this manicure to last the week. However, Play Date has a nice, glossy finish on its own. It’s all-around one of my favorite purples in my entire collection!

Essie – Play DateYou can purchase Essie Play Date on Amazon HERE for $8.50. You can also check your local drugstore and save some cash by using store coupons. For example, CVS often offers a percentage off or a dollar off coupon on anything in the store. Please let me know your favorite Essie polish in the comments!

This post contains an affiliate link. All opinions are my own. See my Disclosure Policy for more information.

Mia Adora 3D Fiber Lash Mascara Review | Step by Step Photos

Happy Saturday! If you’ve been a follower of mine for a while now, you’ll know that I am a mascara junkie! In the past year or so, I’ve noticed a big trend in the beauty community when it comes to 3D Fiber Lashes. I was contacted by the brand Mia Adora to review its 3D Fiber Lash Mascara, so I decided to go for it and see if it lives up to the hype. Let me go ahead and show you the product and how it works!

ABOUT THE PRODUCT

Mia Adora 3D Fiber Lash Mascara Review Mia Adora 3D Fiber Lash Mascara ReviewThe Mia Adora 3D Fiber Lash Mascara comes in a sturdy case with a magnetic closure. I really like how the instructions on how to use the product are clearly printed on the inside of the case. As you can see, this set comes with two tubes – one is the Magnifying Gel and the other is the Natural Fiber Lashes. This product is designed to make your lashes instantly longer and thicker. In fact, the claim is that your lashes will be 300% magnified.

STEP BY STEP APPLICATION

Mia Adora 3D Fiber Lash Mascara ReviewHere are my lashes in their natural state. Can you see them?! I’m going to apply product on the left eye only so you can see the difference in the photos. Mia Adora also recommends you apply the product one eye at a time.

Mia Adora 3D Fiber Lash Mascara ReviewThe first step is to apply the Magnifying Gel from base to top in 15-20 strokes. This is a black gel that looks and feels like a normal mascara. It separates the lashes and primes them for the fibers.

Mia Adora 3D Fiber Lash Mascara ReviewWhile the Magnifying Gel is still wet, apply 10-15 strokes of the Natural Fiber Lashes from mid-lash to the top. Then, wait about 20 seconds for the fibers to dry.

Mia Adora 3D Fiber Lash Mascara ReviewFinally, apply another 15-20 strokes of the Magnifying Gel. This is designed to lock the fibers into place.

Mia Adora 3D Fiber Lash Mascara ReviewHere is my my finished look with one round of the 3D Fiber Lash Mascara. I do think my lashes look nice and full, but the look isn’t different from my normal mascara routine. The only difference is the bit of added length, but I could use some more volume.

Mia Adora 3D Fiber Lash Mascara ReviewMia Adora’s instructions mention that you can repeat Steps 2 and 3 if you want a more dramatic look. I did a second coat of the 3D Fiber Lash Mascara on my left eye so you can see how it compares to one coat. It definitely adds more volume, which I really like. If I were to use this mascara on a regular basis, I would definitely go for a second round of the mascara.

WHERE TO BUY

All in all, I think the Mia Adora 3D Fiber Lash Mascara is a good product to own if you have short eyelashes and you really want some added length. It does add some time to your makeup routine, and clean-up is very messy because the fibers go everywhere! Mia Adora does say that this can be worn over your normal mascara for an even more dramatic look, but because this product is $29.95 on Amazon HERE, I wanted to test it alone. I shouldn’t have to purchase an additional product to get my money’s worth! Thus, while I think the 3D Fiber Lash Mascara works, I do not see a 300% magnification in my lashes. I recommend it if you have the money and are looking to test out the product, but I don’t think this is a must have for your beauty routine. My drugstore mascaras get me results that I can enjoy just as much!

Please let me know your thoughts on the 3D Fiber Lash Mascara craze in the comments! Do you love it? Do you want to try it? I want to know!

The product in this post was provided for my unbiased review. This post includes an affiliate link. All opinions are my own. Please see my Disclosure Policy for more information. 


Saran Wrap Ombré Manicure for Valentine’s Day featuring Zoya Nail Polish!

Happy Friday! January is coming to a close soon, and that means Valentine’s Day is right around the corner. I wanted to create a festive manicure for the holiday of love that was a bit different than the looks I’ve created in the past. I got to thinking and came up with what I think is a super fun and easy nail art look! I raided my Zoya Nail Polish stash and found the shades that I needed. Let me show you what I’ve dubbed the Saran Wrap Ombré!

Saran Wrap Ombré Manicure for Valentine's Day featuring Zoya Nail Polish!

WHAT YOU’LL NEED:

For this manicure, I used an off-white base and five polishes ranging from light pink to red. I used all creme formulas for this manicure. You can choose whatever you have in your collection, but the shades I used, from lightest to darkest, are:

  • Zoya Jacqueline
  • Zoya Dot
  • Zoya Kitridge
  • Zoya Wendy
  • Zoya Rocha
  • Zoya Livingston

All of these polishes are available on Zoya’s website HERE.

Saran Wrap Ombré Manicure for Valentine's Day featuring Zoya Nail Polish! Saran Wrap Ombré Manicure for Valentine's Day featuring Zoya Nail Polish!Saran wrap nail art is super easy to create! I learned this technique from THIS Pin a few years back. All you have to do is paint your nails with a base color (here, Jacqueline). Once your base is dry, layer a coat of another color polish on top of your base and dab a small ball of saran wrap over your nail. You will get a cool marbled effect! Let your nails dry (they will look quite textured) and use a glossy top coat to even out the layers. I used two coats of top coat to get a flawless finish.

Saran Wrap Ombré Manicure for Valentine's Day featuring Zoya Nail Polish!This manicure can be a little messy to create, so I recommend you use separate pieces of saran wrap for each color polish. When you’re finished, take a Q-tip or clean-up brush and go around your cuticles with acetone to remove any excess. You will be left with a beautiful ombré manicure that is tied together with the marbled effect. I think it looks stunning!

All in all, I hope you liked this simple Valentine’s Day manicure featuring Zoya Nail Polish! Of course, you can use the saran wrap technique with any polishes and any colors you choose. I will definitely be using this technique more, as I forgot how easy it is to create and how great it looks! Please let me know in the comments if you’ve ever tried a saran wrap manicure, and what your manicure for Valentine’s Day this year will be!

The products in this post were provided for my unbiased review. All opinions are my own. See my Disclosure Policy for more information.


Zoya Naturel Satins Collection | Transitional 2015

Happy Thursday! I am beyond excited today to show you the brand new Zoya Natural Satins Collection! This line of six nail polishes has a unique satin finish that is somewhere between matte and glossy. They are designed to provide opaque coverage that lasts longer than your typical matte manicure, while still looking flawless and super chic. I shrieked when these beauties arrived to me for review, and you’ll see why when I show you the swatches. The Naturel Satins are stunning!

Zoya Naturel Satins Collection | Adventures in Polishland

Zoya – Ana Zoya – AnaFirst up is Ana, what Zoya describes as a light almond shade. Ana has a great formula that is opaque in two coats. The Satins have a very unique formula. When you apply them, you think they are going to dry streaky, but as they dry they magically transform into a smooth and flawless finish. Ana is no exception, and I love this unique color.

Zoya – Rowan Zoya – RowanNext up is Rowan, a light brown polish Zoya describes as a suede taupe. Rowan also has a perfect formula that is opaque in two coats. I can’t get over how chic these Satin polishes look on me! I would never think to put on a taupe polish for daily wear, but Rowan has changed my mind!

Zoya – Sage Zoya – SageSage is up next, and it is a gorgeous sage green polish. I really love green polishes, and Sage is no exception! Again, it has a great formula that is opaque in two coats. Sage is also an on-trend color for this time of year (I’ve seen people rocking sage fashion all over NYC!).

Zoya – Leah Zoya – LeahNext up is Leah, a Satin polish with just a hint of purple pigmentation. Leah is also opaque in two coats, and has the flawless Satin formula. I love the muted color of this polish, as it is so classy and work appropriate while still being a purple nail polish!

Zoya – Tove Zoya – ToveZoya Tove is another really unique shade! It is a slate grey polish with blue undertones. I applied two coats in the photos above, and I’m loving how it looks. Tove is edgy yet feminine at the same time!

Zoya – Brittany Zoya – BrittanyLast but not least is Brittany, a beautiful rose mauve polish, and my favorite in the Satins Collection! I saved Brittany to swatch last because I knew this just had to be my daily manicure of the moment. I’m wearing it as I type up this post! Of course, Brittany has a perfect formula that is opaque in two coats. If you get only one polish from this collection, I highly recommend Brittany!

All in all, I am beyond in love with the Zoya Naturel Satins Collection! As this is Zoya’s transitional line this year, these six polishes can help bring you from winter to spring in style. Each polish has an amazing formula and stunning finish. I can’t recommend them to you enough! You can purchase these polishes on Zoya’s website HERE for $9 each or $54 for the set. Please let me know in the comments which Satins you’ll be picking up!

The products in this post were provided for my unbiased review. All opinions are my own. See my Disclosure Policy for more information. 

Striping Tape Nail Art featuring Sally Hansen Lustre Shine Moonstone

Happy Monday! I’ve been trying to reach into my nail polish collection and use polishes that I haven’t picked up in a while. This weekend I was drawn in by Sally Hansen Lustre Shine in the shade Moonstone. I decided to create a cool, punk inspired nail art look. Let me show you the final product!

Striping Tape Nail Art featuring Sally Hansen Lustre Shine Moonstone Striping Tape Nail Art featuring Sally Hansen Lustre Shine MoonstoneWHAT YOU NEED:

  • Black Nail Polish – Michael Marcus Once You Go Matte
  • Opalescent Nail Polish – Sally Hansen Lustre Shine Moonstone [BUY]
  • Glossy Top Coat – Essie Good to Go [BUY]
  • Striping Tape [BUY]
  • Scotch Tape [BUY]

To create this awesome manicure, I began by painting my nails with a black base. Then, I applied two coats of Moonstone over the black and let that dry completely. I then used striping tape to create a double “X” on every nail except my accent nail. Once the striping tape was in place, I painted over it with the black polish and carefully peeled off the tape. For the accent nail, I simply used Scotch tape and left a triangle on the base of my nail. Last but not least, I used a glossy top coat and applied two coats to each nail once my polish was completely dry. This evened out the layers and left me with a shiny finish.

Striping Tape Nail Art featuring Sally Hansen Lustre Shine MoonstoneAll in all, I am absolutely loving this funky manicure! It was so easy to create and it allowed me to use some of my older polishes in a new way. This look can be adapted to fit your personal tastes by changing up the colors or the patterns. I love experimenting with tape! Please let me know in the comments if you like my manicure, and let me know if you like using striping tape, too.

Some of the products in this post were provided for my unbiased review. Some of the links in this post are affiliate links. All opinions are my own. See my Disclosure Policy for more information. 

Defeat Winter Hair & Skin with InstaNatural | Argan Oil, Argan Oil Hair Mask & Vitamin C Serum Reviews

Happy Sunday! Today I have three product reviews to share with all of you. I recently discovered a brand called InstaNatural that is dedicated to creating safe, affordable, and natural skincare products. InstaNatural recently came out with its first hair mask as well, so they sent me three goodies to test out. If you’re looking to pamper your skin and hair in these cold winter months, this is the post for you!

InstaNatural Product Reviews | Argan Oil, Argan Oil Hair Mask, & Vitamin C Serum

ARGAN OIL

InstaNatural Argan Oil Review

4oz Bottle – $17.95

BUY: Amazon | InstaNatural Store 

About the Product

“InstaNatural’s 100% Pure & Organic Argan Oil is a multipurpose moisturizer essential to helping you achieve beautiful skin, hair, nails and body. The cold-pressed oil is lightweight, fast absorbing, and free of fragrances, chemicals and preservatives. Whether you are looking to freshen and soothe dry skin, repair damaged hair, or strengthen brittle nails and cuticles, the application of natural Argan oil is a perfect addition to your daily regime.” – InstaNatural

My Experience

I was nervous to test out this Argan Oil because in the past a similar product broke out my skin terribly. I decided that I would not use this oil on my face because my skin can be sensitive. Instead, I use it primarily on my hands. It is perfect for my dry hands, and it really soothes my cuticles. I do find the scent a bit weird, but that’s due to InstaNatural leaving the oil in its natural state. It’s not totally overwhelming, so I can deal with it! Plus, I really love that this oil comes with a pump bottle so I don’t have to worry about a mess. Just one pump is enough to moisturize my hands.

ARGAN OIL HAIR MASK

InstaNatural Argan Oil Hair Mask Review InstaNatural Argan Oil Hair Mask Review8oz Tub – $17.95

BUY: Amazon | InstaNatural Store

About the Product

“InstaNatural’s Argan Oil Hair Mask is a deep conditioning treatment designed to transform dry and damaged strands into soft, shiny, healthy hair. Its restorative ingredients – such as Argan Oil, Japanese Green Tea, Amino Acid Complex, Coconut Oil, Shea Butter, Jojoba Oil, Avocado Oil & Vitamin B5 – work together to penetrate hair deep down and deliver ultimate nourishment and hydration to enhance texture and shine. This intensive blend full of organic ingredients also serves to strengthen hair to defend against heat damage and other external aggressors.” – InstaNatural

My Experience

This hair mask came into my life at the perfect time! Not only am I about to run out of the hair mask I’ve been using, but my hair is definitely suffering in this dry, winter weather. My favorite thing about this Argan Oil Hair Mask is that it can be used either as a deep conditioning treatment 1-2 times per week or in place of your regular conditioner. To use as a treatment, let the mask soak into your hair for 5-20 minutes and then rinse out. Otherwise, use as you would your daily conditioner. I chose to use the mask as a treatment. I really like the texture as it is lighter than a typical hair mask but still heavy enough for some deep conditioning. I left it on my fine hair for about five minutes and was really surprised when I didn’t have much to rinse out. My hair was so dry it absorbed nearly all of the oil! In fact, my hair looked shinier and felt smoother all day long, too. I’ll be using this on the regular for sure!

VITAMIN C SERUM

InstaNatural Vitamin C Serum Review

InstaNatural Vitamin C Serum Review

1oz Bottle – $16.97

BUY: Amazon | InstaNatural Store

About the Product

“InstaNatural’s Vitamin C Serum is an enriched formula packed with ingredients that hydrate and nourish skin to fight against the signs of aging. Our new formula now includes even more nutrients to help diminish the appearance of spots and discoloration, such as rosehip oil, argan oil, plant stem cells, algae extract and sea buckthorn oil. The vigorous combination of these ingredients form a super serum blend that delivers ultimate antioxidant care for your skin.” – InstaNatural

My Experience

I’ve used a different Vitamin C Serum in the past and fell in love with it. Same goes for this one from InstaNatural! I was a bit surprised to see that this serum is a bit on the thick side and is a bright orange color. However, this serum feels amazing and I can definitely feel the difference in my skin after just one week of use. My skin is more hydrated, even, and clear, and it just looks better as well. I’ve even gone a few days without my normal makeup routine because I just feel more confident. This Vitamin C Serum is a keeper for sure!

All in all, I’m so glad InstaNatural gave me the opportunity to test out the brand’s products! I’m really impressed with each one, and I’m especially loving the Vitamin C Serum and Argan Oil Hair Mask. I also love the amazing prices of the InstaNatural products. You get a LOT of product for the price – it’s almost like buying in bulk when it comes to the Hair Mask! I highly recommend you check out this fabulous line!

Connect with InstaNatural

Website | Facebook | Twitter | Google+ | Amazon

The products in this post were provided for my unbiased review. This post contains some affiliate links. All opinions are my own. See my Disclosure Policy for more information.

Makeup by One Direction Limited Edition Tour Case Review

Happy Saturday! Today I have another review of one of the limited edition products from the brand Makeup by One Direction. If you are looking for an all-inclusive set, look no further. This case includes eyeshadows, eyeliners, mascara, nail polish, lipstick, lip gloss, glitter pots, and stickers! I got to work swatching the products for you so you can see what’s inside. Let me open up the tour case for you!

Makeup by One Direction Limited Edition Tour Case Review

Makeup by One Direction Limited Edition Tour Case ReviewHere is what the Tour Case looks like before and after opening it. As you can see, it expands to three pop-up drawers. This is really an all-in-one set if you’re a One Direction fan!

Makeup by One Direction Limited Edition Tour Case Review Makeup by One Direction Limited Edition Tour Case Review Makeup by One Direction Limited Edition Tour Case ReviewHere are close-up looks of each drawer. First is the eye makeup drawer that includes 45 eyeshadows, two eyeliners, and one mascara. Next is the nail polish and lip product drawer that includes six polishes, two glitter pots, one lip gloss, and two lip crayons. There is also a UV light if you’d like to see how the nail polish looks in that kind of light. Finally, the third drawer contains stickers that you can use to decorate the tour case. Now let’s move on to the swatches!

EYESHADOW

This case contains 45 eyeshadows in a variety of formulas. Most are shimmers, but there are also a few mattes thrown in as well as some glitters and creams. The quality of the shadows varies dramatically. Some are amazing, while others are not great at all. The pigmentation also varies. I think this is a fun set for younger girls starting out with makeup who just want to play around with color, but I don’t recommend it for everyday makeup use. I swatched the shadows without a primer, and will let you know the colors from left to right in each swatch picture.

Makeup by One Direction Limited Edition Tour Case Review Metallic Mint, Khaki, Graphite, Spark, and Spotlight

Makeup by One Direction Limited Edition Tour Case ReviewNight Sky, Glacial, Poser, Mocha, and Dawn

Makeup by One Direction Limited Edition Tour Case ReviewQuartz, Bronzed, Ultra Violet, Sequin, and Blush

Makeup by One Direction Limited Edition Tour Case ReviewSurfer Blue, Mushroom, Cornflower, Dusk, and Amped

Makeup by One Direction Limited Edition Tour Case ReviewLondon Sky, Midnight, Center Stage, Irish Luck, and Lime Light

Makeup by One Direction Limited Edition Tour Case ReviewAqua Mist, Spring, Georgia Rose, Melody, and Harmony

Makeup by One Direction Limited Edition Tour Case ReviewBrick, Sherwood, Terra Cotta, Earth, and Faded Jeans

Makeup by One Direction Limited Edition Tour Case ReviewCityscape, Galaxy, Summer Rain, Lightening, and Twilight

Makeup by One Direction Limited Edition Tour Case Review

Coffee Bean, Emerald, Sapphire, Amethyst, and Onyx

EYELINER

Makeup by One Direction Limited Edition Tour Case ReviewThis set also includes two eyeliners in silver and black. I think it’s great to have these in any set!

Not pictured is also a purple mascara. If you’d like to see swatches of other colored mascaras from Makeup by One Direction, check out my review HERE.

NAIL POLISH

Makeup by One Direction – Strobe

The first nail polish in this Tour Case is Strobe, a white creme polish. Strobe’s formula was a little tricky, but it evened out nicely in three thin coats. It’s awesome that Makeup by One Direction included the basics in this set!

Makeup by One Direction – Blue a FuseNext up is Blue a Fuse, a glitter top coat with blue, white, and pink glitters. I applied one coat over Strobe, and I was a little disappointed with how many glitters came out. I would have liked more glitter in one coat, but overall Blue a Fuse is still a great polish!

Makeup by One Direction – RebelMy favorite polish in the Tour Case is Rebel, a bright fuchsia pink. Rebel has a perfect formula, and it is just stunning. I love my pink polishes, and this is a great one to have!

Makeup by One Direction – Star StruckThe next glitter polish in the set is Star Struck, a clear base filled with pink, white, and fuchsia glitters. The glitters were easier to apply with Star Struck than with Blue a Fuse, and I put one coat on top of Rebel. I am really liking this polish combination!

Makeup by One Direction – Street PunkAlong with a white, Makeup by One Direction also included a basic black creme. This polish is called Street Punk, and is a good black polish. I applied two coats and didn’t have any issues with the formula.

Makeup by One Direction – Graffiti The last polish in the Tour Case is Graffiti, a glitter polish with black and white glitters. I applied one coat over Street Punk, but in the future I think I’d layer it over a non black polish to see the glitters easier.

Also included in this set are two loose glitter pots that can be used on the nails or even as eyeshadow pigments. They are in the shades Voltage (orange) and Shock (pink).

LIP PRODUCTS

Makeup by One Direction Limited Edition Tour Case ReviewLast but not least, the Tour Case includes three lip products. Here are swatches of all three on my arm, but I have lip swatches for you as well!

Makeup by One Direction – BackstageThe lip gloss in this set is Backstage, a red glitter gloss. It has a nice wash of color without being too dramatic, but the glitter is a bit grainy on the lips. I would love this gloss if it didn’t contain glitter, but if you like glitter you would love this!

Makeup by One Direction Limited Edition Tour Case ReviewNext up is a pink Lip Crayon. I’m really liking the formula of these lip crayons. They apply super easily and have a matte finish. You can, of course, add gloss on top, but I like the matte look. Be forewarned, though – these stain! That’s a benefit if you want it to last though eating and drinking, though.

Makeup by One Direction Limited Edition Tour Case ReviewFinally, there is also a true red Lip Crayon. I’m really impressed with the great quality of this lipstick. I definitely think it’s a highlight in the tour case for sure!

All in all, the Makeup by One Direction Tour Case is chock full of a ton of fun makeup products. I do recommend this case for One Direction fans, or for those who are just getting started with makeup. The quality is not the best on the eyeshadows, and some of the other products could have better formulations as well. However, for a full case that retails $49.95, I would definitely consider whether that price is worth it for you. If you’re looking for a good deal, check out the sale going on right now at Macy’s, where you can snag the tour case for 50% off HERE! As always, you can like Makeup by One Direction on Facebook HERE to stay up to date with the brand. Please let me know your thoughts on the Tour Case in the comments!

This product was provided for my unbiased review. All opinions are my own. See my Disclosure Policy for more information. 

Majestic Bombay Precision Eyelash Curler Review | Before & After Photos Included

Happy Wednesday! Today I’m excited to bring you a review of the new Precision Eyelash Curler from the brand Majestic Bombay. I’ve only tried one eyelash curler before in my life (see that review HERE), and while I don’t use eyelash curlers often they are certainly great beauty tools to have on hand. I luckily have naturally curled lashes, but I know some of you have straight lashes. I hope this review will help you decide if this is the curler for you!

ABOUT THE PRODUCT

Image Courtesy of Majestic Bombay

Majestic Bombay Precision Eyelash Curler Review | Adventures in PolishlandThe Precision Eyelash Curler has a “no pain” design to make curling your lashes super easy. The handles are gripped so your fingers won’t slip during the clamping process, and the head of the curler is large and curved to fit any eye shape. It is also designed to capture every lash so they stay curled all day. Majestic Bombay provides two refill pads with each curler, and there is a 90-day money back guarantee! If you don’t like your curler you can return it after use for a full refund. How awesome is that?!

MY BEFORE & AFTER

Majestic Bombay Precision Eyelash Curler Review | Adventures in PolishlandMajestic Bombay Precision Eyelash Curler Review | Adventures in PolishlandMajestic Bombay Precision Eyelash Curler Review | Adventures in PolishlandAs you can see from my Before and After photos, there is a significant curl to my lashes after using the Precision Eyelash Curler. I found it very easy to use, and I think the head of the curler really did fit my eye shape well. I was especially impressed with how the curler worked on my left eye. For some reason, my left eyelashes are wonky and tend to clump up easily. The Precision Eyelash Curler completely solved that problem! I now have beautiful and full lashes on both eyes. I’m really excited with the results!

All in all, I highly recommend this eyelash curler. It’s very easy to use, and it definitely curls your lashes with an all-day curl. You can purchase the Precision Eyelash Curler from Majestic Bombay on Amazon HERE. The retail price is $31.00, but as I type this post it is on sale for just $17.00! I think it is worth the price since you are getting a great quality beauty tool, and because it comes with two refill pads. Please let me know in the comments if you decide to pick up this product!

UPDATE: I have great news! Majestic Bombay has just informed me that there is a $5.00 off coupon for this eyelash curler on Amazon. Enter code 5X8X9V9W in your cart at checkout for these added savings.

 The product in this post was provided for my unbiased review. All opinions are my own. See my Disclosure Policy for more information.

Pinspiration | Neutral & Gold Manicure + Using Your Textured Polishes in a New Way!

Happy Tuesday! I’ve really been into Pinterest lately, and spotted THIS beautiful accent nail that I just had to recreate. Neutrals are really great in the winter months, but the pop of gold sparkle added a classy yet fabulous touch to the manicure. I searched through my nail polish collection to see which shades matched the Pin best, and to my surprise the best full coverage gold glitter I owned was a textured formula. I decided to make it work! Let me show you the results!

Step 1: Paint Your Nails with a Nude Beige Polish

Milani – Vanilla AlmondI chose Milani Vanilla Almond (review HERE), but you can use whatever polish you own. Make sure you let this base dry completely before moving onto step two. I actually let my manicure dry overnight, but to be safe I think 1-2 hours will be satisfactory depending on the formula of the polish and the humidity of your location.

Step 2: Apply Tape to Nail and Paint an Off-White Diagonal

Color Club – Mod in ManhattanI’ve used the tape trick since my blog’s inception. Simply take a small piece of tape, press it on the back of your hand to remove some of the stickiness, then place on your nail. Paint over the tape and remove while the polish is still wet. I use Color Club Mod in Manhattan (review HERE) as my off-white polish. If you only own a white, that will work, too!

Step 3: Apply Tape on Opposite Side of Nail and Paint a Gold Glitter Diagonal

JulieG – Gift of GoldFinally, repeat the above step with the tape on the opposite side of your nail. Again, make sure to let step two dry completely before moving on. As you can see from my manicure, I didn’t wait for my polish to dry enough and had to touch up the lines. For my gold glitter I chose JulieG Gift of Gold. This is a textured polish, but it was the most full coverage of all my gold glitters. To achieve a glossy finish, I simply applied Essie Good to Go over the entire nail! I’m loving the finished product!

All in all, it is super easy to create this neutral and gold manicure so long as you have a bit of patience with the drying process. Of course, you can use any nail polish colors you wish to recreate this look, but I think this color palette is stunning. Even though textured polishes may not be on trend anymore, you can still find ways to use those that you purchased in nail art and by applying a glossy top coat. Please let me know in the comments if you’ll be recreating this look!

Some of the products in this post were provided for my unbiased review. All opinions are my own. See my Disclosure Policy for more information.