Tag: loreal

Summer 2014 Favorites | Beauty, Lifestyle, & More!

Happy Saturday! You may have noticed that this summer I didn’t post my usual monthly favorites. By the end of June and then July, I realized that I was reusing the same products over and over, and thought a combined summer favorites would be the best way to share my new favorite products with you. Plus, it’s a great way to reflect over the past few months! This was probably the last summer vacation I’ll ever have, since I’ve just embarked on my final year of school. Let me show you everything I loved the past few months!

NAIL POLISH 

L'Oreal – Jean & Tonic
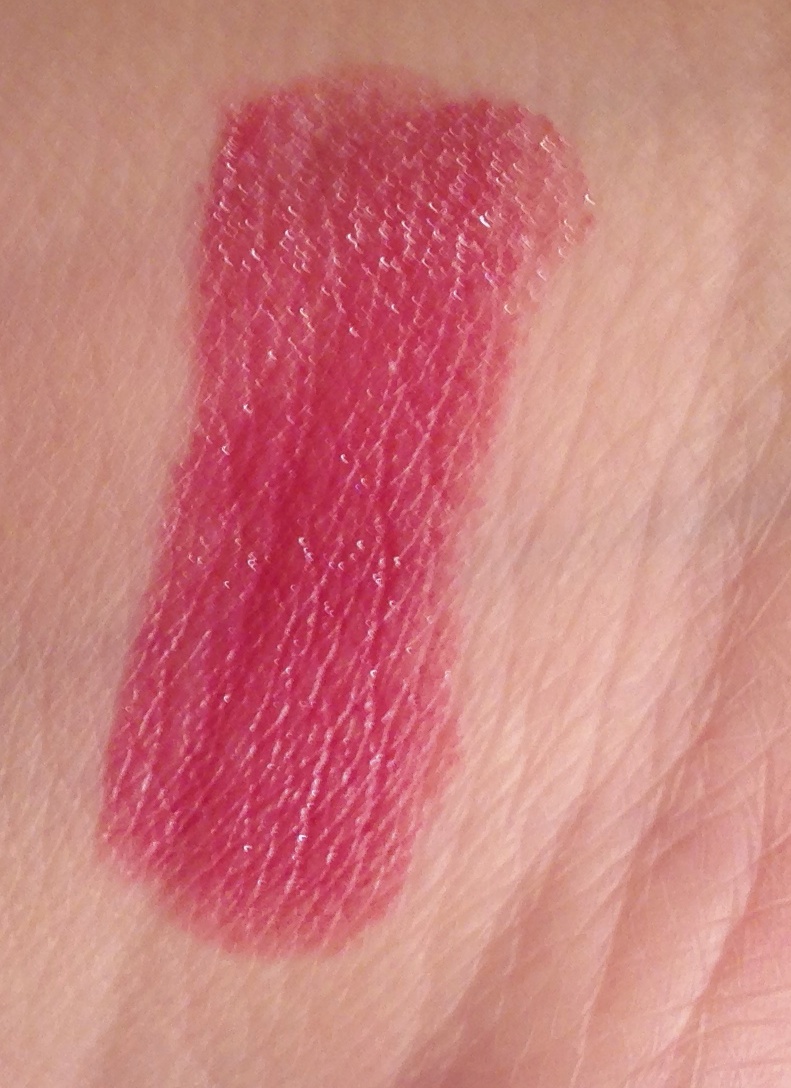
L’Oreal Jean & Tonic [REVIEW]

I wore this textured shade from L’Oreal a ton this summer! In fact, I made a dent in the bottle because I loved it so much! Make sure to check out my review for more details. If you like this polish, make sure to check the limited edition displays at your local drugstore ASAP.

MASCARA

CoverGirl Clump Crusher in BlackCoverGirl Clump Crusher Mascara in Black [BUY]

I finally tried the famous Clump Crusher and I’m so glad I did! It really separates my lashes for a full look. I do wish it had a bit more “va va voom,” but I can always layer a thicker mascara on top for a more dramatic look. If you’re looking for a great mascara to use on the daily, I recommend this one.

EYEBROWS

Milani Brow Fix KitMilani Brow Fix Brow Kit in Light [BUY]

I rediscovered this brow product over the summer, and pulled it out from the depths of my makeup collection! I’ve used it a ton, and I’ve found that the powder looks really natural and is easy to apply. I still use my eyebrow pencils sometimes, but in the hot summer sun, powder was the best option. Plus, this stuff lasts forever!

BLUSH 

NYX Cream Blush in NaturalNYX Cream Blush in Natural [BUY]

I finally reached for cream blush this summer, and I’m happy I got over my cream blush fear! It’s lightweight and extremely blendable, so I don’t look cakey. I definitely need to pick up more cream blushes for my collection, so let me know your favorites in the comments!

PRIMER

Dr. Brandt Pores No MoreDr. Brandt Pores No More Pore Refiner [BUY]

I brought this sample size primer with me when I was traveling and fell in love! It’s just like my beloved Too Faced Primed & Poreless, but even better. Unfortunately, the full size is $45 (yikes), so I’ve been making this sample last as long as possible. If your budget allows for Pores No More, I say get it!

FRAGRANCE

Coconut Lime BreezeCoconut Lime Breeze Body Spray [BUY]

I love lighter scents in the summer, and reach for body sprays more than perfumes. I got this one during the Bath & Bodyworks semi-annual sale for just $1.50, and I love it! It’s sweet, but not sickening. I pretty much love anything with a coconut scent, though!

TV SHOW

Big Love 

I watched a lot of shows on Amazon Prime this summer, one of them being the complete series of Big Love. I don’t get HBO, so it was great to be able to watch some HBO shows for free this summer with my Prime subscription. Big Love was so addicting! It’s about a polygamist family in Utah. There is serious family drama, and it always kept me at the edge of my seat. I highly recommend it, but ask your parents if you’re under 18 since it has a lot of violence and some adult content.

BOOK

The Immortal Rules by Julie Kagawa [BUY]

I also read a lot this summer, and one of my favorites was the Blood of Eden trilogy by Julie Kagawa. I’m always hesitant when it comes to vampires because of the whole Twilight thing, but gave this series a try, and I’m so glad I did! Kagawa does an amazing job of combining vampires into the dystopian genre. The trilogy follows teenager Allison as she decides to become a vampire, and the new life she must lead. The first book in the series is called The Immortal Rules (liked above). I highly recommend it!

EXPERIENCES

Las Vegas Strip 2014

West Coast Adventures – Los Angeles & Las Vegas

I had the amazing opportunity this summer to visit both Los Angeles and Las Vegas. My brother and sister-in-law live in LA, so I made sure to visit them and meet my new nephew for the first time! It was wonderful to see them! I also met up with my grandma and cousin out there, and we took a road trip to Vegas. I’ve never been to Vegas before and it was an unbelievable experience. I thought NYC was big! If you ever get the change to visit Las Vegas, go! There is something for everyone!

All in all, I had a great summer even though it went by super quickly! Please let me know in the comments some of the products you loved these past few months. Also let me know what your favorite moment of the summer was. Feel free to tag me on social media using the hashtag #PolishlandFaves so I can see your photos!

This post contains some affiliate links. All opinions are my own. See my Disclosure Policy for more information. 

L’Oreal Paris Miss Denim Limited Edition Collection | Distressed Turquoise and Jean & Tonic

Happy Monday! I was recently perusing the limited edition displays at Duane Reade and found the Miss Denim Collection by L’Oreal Paris. I absolutely love L’Oreal polishes, so when I saw some gorgeous textured creams, I knew I had to grab a couple. I decided to grab two of the pastel shades to add to my collection.

L'Oreal – Distressed Turquoise L'Oreal – Distressed Turquoise First up is Distressed Turquoise, a sky blue polish. I applied two coats to achieve opacity, and I am loving the formula! It dries amazingly fast and glides on with ease. I wore Distressed Turquoise for a few days, but did experience chipping on the second day of wear. I was a bit disappointed with that, but the good thing with textured polish is you can always add another coat and it still looks great!

L'Oreal – Jean & Tonic L'Oreal – Jean & TonicI also picked up Jean & Tonic, a deep seafoam shade that looks a bit more turquoise to me than Distressed Turquoise! Jean & Tonic also has a flawless formula that is opaque in two coats. It is more long-lasting, and I wore it for about 3-4 days before I experienced any wear. I do recommend a healthy layer of base coat with this polish, as it can stain if you don’t protect your nails. I’ve already worn this polish a few times this past month!

All in all, I am really loving the Miss Denim Collection from L’Oreal Paris! Not only do they have a great application, but they come off easily with a regular nail polish removal process – no foil needed! These polishes range from $4.99-6.49 at your local drugstore, so make sure to be on the hunt for them this summer. You don’t want to miss out on these limited edition shades if you love textured polish as much as I do!

Is there a drugstore nail polish you would like me to review on Adventures in Polishland? Let me know in the comments!

L’Oreal Les Blancs Collection | Spot Me & Le Pastille

Happy Saturday! Today I’m excited to share with you some brand new polishes for spring. I am so ready for winter to be over, that yesterday I ran to Duane Reade with the mission of getting some new beauty products for the spring season. When I spotted the new L’Oreal Les Blancs Collection, I knew I had to grab a couple. I picked up the two glitter shades, and ran home to test them out. Let me show you these gorgeous polishes!

L'Oreal Les Blancs Collection

L'Oreal – Spot Me L'Oreal – Spot MeFirst up is Spot Me, a pale blue polish with black hexagonal glitters from small to large mixed throughout the base. Spot Me has a great formula! It applies easily, and there was no fishing for glitters. I was really impressed with the coverage in two coats as well. The finish reminds me of a robin’s egg. I really like it!

L'Oreal – Le Pastille L'Oreal – Le PastilleNext up is Le Pastille, a pink version of Spot Me. Le Pastille also has a flawless formula. I cannot stress how easily these polishes apply! It always makes me happy when I don’t have to do anything special to get glitters out of the bottle and onto my nails. I applied two coats of Le Pastille, and finished up with a layer of butterLONDON Hardwear top coat (as I did with Spot Me as well). I love the juxtaposition of the black glitters on a baby pink base.

All in all, I’m loving these two glitter polishes from the new Les Blancs Collection from L’Oreal! In fact, I might go back to the drugstore and purchase the creme polishes from the collection, too. As I mentioned above, I scored these polishes at my local Duane Reade, but be on the lookout for the spring display at your drugstore. The polishes retail for $6.49 each in NYC, but I noticed a $4.99 price tag over on Nouveau Cheap’s blog. Let me know what you think of these polishes in the comments!

Let Your Natural Beauty Shine in 2014 with L’Oreal Products! #WalgreensBeauty

CB Disclosure White Background 600 px wide

Happy Sunday! Today I am excited to share with you some great products from L’Oreal that are all new to me. Adventures in Polishland is all about being fabulous and affordable, and everything in this post sure fits that description. I headed to Walgreens to check out the L’Oreal section, and got some great deals along the way. I had my eye on the brand new Voluminous Butterfly Mascara, and of course picked up some other goodies as well. Let me show you the makeup and nail looks I created, to share how to be beautiful in 2014!

Let Your Natural Beauty Shine in 2014 with L'Oreal Products! WalgreensBeauty #shop #cbias

MAKEUP TUTORIAL

My first aim was to create a new makeup look that let my natural beauty shine. If you’ve followed my blog for a while, you know that while I love trying out new makeup trends, I typically stick to the basics. If you’re looking for a more natural look in the new year, here are a few makeup tips I have for you!

STEP 1 – A FLAWLESS COMPLEXION

L'Oreal Paris Magic Nude Liquid Powder #WalgreensBeauty #shop #cbias
L'Oreal Paris Magic Nude Liquid Powder Swatch #WalgreensBeauty #shop #cbias

L’Oreal Paris Magic Nude Liquid Powder – 312 Classic Ivory – $12.99

I always like to use some sort of foundation just to ensure my skin is looking clear and even. I’ve been intrigued with the concept of the Magic Nude Liquid Powder since it was first released, and just had to try it! This foundation goes on like a liquid and dries to a powder finish. Just shake the bottle, tap a few drops into your hand, and rub it onto your face like a lotion. I was skeptical, but it works! I get a gorgeous, natural finish that lasts all day! I’m so impressed with this foundation, and highly recommend it.

STEP 2 – AWESOME EYELASHES

#WalgreensBeauty #shop #cbias
I found the Voluminous Butterfly Mascara right away! My store had a lot in stock!

#WalgreensBeauty #shop #cbias 
#WalgreensBeauty #shop #cbias

L’Oreal Paris Voluminous Butterfly Mascara – Blackest Black – $8.99

L’Oreal just released the Voluminous Butterfly Mascara, and as soon as I saw the unique applicator I couldn’t wait to give it a try. I rarely like a mascara upon the first use, but I am blown away with this one! Not only does it grab onto each lash to separate and lengthen, but it truly curls the lashes into a beautiful, winged out look. The formula is great, and I experienced no clumping whatsoever. I also like that this mascara is ophthalmologist tested, and safe for even those with sensitive eyes. I’ve definitely found my new favorite mascara!

STEP 3 – LUSCIOUS LIPS

#WalgreensBeauty #shop #cbias

L’Oreal Paris Colour Riche Lipcolour – 174 Rose Taffeta – $9.99

The last step in this makeup look is a bit of lipstick. Despite what other makeup you may (or may not) be wearing, lip color can really change up your look completely. I grabbed a nice pink shade that isn’t too bright to ensure my lips would look polished yet still natural. I’m loving Rose Taffeta! The formula is moisturizing and easy to apply. Plus, the shade is quite wearable.

COMPLETED MAKEUP LOOK

#WalgreensBeauty #shop #cbiasMANICURE

#WalgreensBeauty #shop #cbiasOf course, I had to pick up a couple L’Oreal nail polishes at Walgreens, too. I spotted the limited edition The Magic Top Coats display, and grabbed The Holographic. Then I headed to the permanent display to pick up a color to go with my new top coat.

#WalgreensBeauty #shop #cbias #WalgreensBeauty #shop #cbiasI began with L’Oreal in Paparazzi Pleaser, a purple creme polish that has a hint of blue to create a dustier shade. I applied three coats for the look in the photos, and I’m loving this color for winter. It’s not too “out there,” but it’s different than a neutral or pink. Paparazzi Pleaser also pleases Adventures in Polishland!

#WalgreensBeauty #shop #cbias #WalgreensBeauty #shop #cbias #WalgreensBeauty #shop #cbiasTo complete the look, I applied two coats of The Holographic, a flakie top coat. I have never worked with a flakie before, but it is quite like a glitter top coat, just with flakes of holographic leaf in place of glitters. I was surprised with how chunky The Holographic is, but it definitely looks neat. I had a difficult time capturing just how holographic my nails look in person, but the last picture gives you an idea of the reflective shine. It’s really cool!

L’OREAL PARIS BUTTERFLY MASCARA LAUNCH EVENT

Join L’Oreal and Walgreens on Wednesday, January 15 at the Walgreens in Times Square from 11:00am–3:00pm! Get an eye makeover in-store, and pick up the new mascara! This is sure to be a fun experience, and I just know you’ll love the mascara!

GIVEAWAY

Last but not least, L’Oreal is also providing one of you with the Voluminous Butterfly Mascara! Please enter using the Rafflecopter below, and ensure you read all of the Terms & Conditions written in the widget.

 a Rafflecopter giveaway


What’s Under There? Part Three

Happy Thursday! It’s time for another edition of What’s Under There?! In this series, I share with you polishes that I layered under glitters, or used in nail art. Today I’ll be showcasing the polishes that served as the bases in my Kawaii Nail Lacquer post. You can see that review HERE if you missed it. Let me show you what was under those glitters!

IMG_2556IMG_2558First up is L’Oreal Breaking Curfew, a super dark, plum jelly polish. Breaking Curfew is definitely outside of my comfort zone! I got it at Rite Aid a few months ago because I wanted to try something new. Unfortunately, the formula is a bit difficult to work with, but three coats is a full coverage, opaque look. I do love the color, and I think it’s perfect for fall. I might have to try this as a jelly sandwich at some point!

IMG_2571 IMG_2576Next up is OPI Skull & Glossbones from the Pirates of the Caribbean Collection! Skull & Glossbones is a gorgeous off-white polish with a hint of green. It is the perfect neutral shade, and applies really nicely. I need two coats to achieve opacity. I really love how Skull & Glossbones is understated and classy at the same time. Even though it is from a retired collection, it is still available on Amazon!

IMG_2585IMG_2588ncLA’s Malibu Beach Babe is up next. This is a deep teal creme polish that just screams “fall” when I put it on despite its summery name. Malibu Beach Babe has a great formula that is opaque in two coats. I’ve worn it twice now, and I’m sure I’ll continue to get even more use out of it. ncLA polish retails for $16, but it is worth the splurge for this one!

IMG_2598 IMG_2602Last but not least is Julep Brandt, an off-black creme polish. Brandt is one of my favorite dark polishes of all time. It has an amazing formula that is opaque in two coats, and is edgy without being a harsh true black. Brandt is great on its own, but I’ve also used it for nail art. This is just an all-around fabulous polish!

All in all, I hope you liked finding out more about these polishes! Make sure to stay tuned for more What’s Under There? posts in the future! Also, don’t forget to enter my Back to School Giveaway HERE. Leave me a comment telling me your favorite polish in this post!


This post contains affiliate links. All opinions are my own. See my Disclosure Policy for more information. 
dELiA*s

Bimonthly Beauty Post: My Current Mascara Collection!

Happy Friday! Today I have another post in my beauty series, and I’m going to focus on my favorite makeup product — mascara! While I don’t wear a lot of eye makeup, I almost always put on some mascara before walking out the door. It is just enough to give me some extra “pop” without being over the top. I find that adding mascara can make me look more polished and ready for the day. I constantly find myself perusing the makeup aisle for new mascaras and great deals! Let me show you the mascaras I’m currently using, and the ones I will be trying out next!

IMG_1586

Here are the four mascaras I currently have in my collection! I think four is more than enough to have for everyday use, so I am focusing on using these up before I open any more. Once you open a mascara and expose it to the air, it has a faster chance at drying up in the tube. That’s why I keep my mascaras wrapped up until I’m ready to use them! As you can see, I have a good mix of both drugstore and high end mascaras. I always get a bargain when I can, though!

Image-2

Brand Name: L’Oreal Voluminous Million Lashes

Price: $7.00 on Amazon [Buy HERE]; also available at drugstores

Best for: Lengthening! I can literally see my eyelashes growing when I apply this mascara. This mascara also gives you very full eyelashes, just as the name “Million Lashes” suggests. This is probably my favorite all-around mascara of all time!

Dislikes: I really have nothing bad to say about this mascara! I’ve been using it for a couple years!

Image-1

Brand Name: Covergirl NatureLuxe Water Resistant Mousse

Price: $3.89 on Amazon [Buy HERE]; also available at drugstores

Best for: A natural, everyday look! I find that this mascara is perfect for adding color to your lashes and for providing some definition without it being too noticeable. It also does a great job at separating your lashes.

Dislikes: My tube is already starting to dry up after just two and a half months of use. That means clumping! It’s not too noticeable yet, but I think I will have to toss this one in another month or so.

Image

Brand Name: Buxom Sculpted Lash

Price: $18.50 on Amazon [Buy HERE]; also available at Sephora

Best for: Shaping and curling! Just as the name suggests, this mascara is amazing at sculpting my lashes. It separates and curls my lashes with ease. I like to turn the wand to get a different angle with the applicator as I use it for added definition. This really helps with my left eyelashes, which seem to be a bit wonky — it makes them look full quite easily!

Dislikes: This mascara does not add much length to my eyelashes, but that’s because it is geared towards shaping them. I love everything else about it!

IMG_1596

Because I’m a mascara hoarder, I already have a couple more ready to go for when I use up the ones in my current collection! On the left is Covergirl Clump Crusher, one that I’ve heard so many good things about! On the right is the brand new Revlon Lash Potion. I recently won the Revlon in a giveaway from the company, and can’t wait to try it!

I hope you enjoyed this post on my current mascara collection! Be sure to let me know what your favorite mascara is in the comments!


Some of the links in this post are Amazon Affiliate links. All opinions are my own. Please see my Disclosure Policy for more information. 


Simple Saturday: L’Oreal in Sweet Nothings

Happy Saturday! Today I have a quick post reviewing the polish Sweet Nothings from the L’Oreal Colour Riche nail polish line. I used it as the base for a glitter manicure that will be featured on Adventures in Polishland very soon! Let me show you this L’Oreal.

IMG_0474

IMG_0476


Sweet Nothings is just what the name describes! This is a very pale pink polish with an extremely sheer formula. I applied three coats and the polish still did not reach opacity. The formula was good — not watery, but it was streaky. Sweet Nothings is a gorgeous neutral and is perfect for professional occasions. It is also great for layering when you don’t want a bright white polish as your base color. It makes me laugh to think that this polish really is Sweet Nothings!

L’Oreal polishes are sold in drugstores for around $6 per bottle. Keep an eye out for coupons in the local paper, and for weekly sales. I love L’Oreal polish and can’t wait to use the others that I have. See my post on Greycian Goddess HERE, and stay tuned to see how Sweet Nothings became a glitter manicure!

Indie Spotlight: I Love Nail Polish

IMG_0132
The pretty polishes in their boxes!

Happy Thursday! Today I have a very exciting review of three polishes from the indie brand I Love Nail Polish. The first thing I noticed about I Love Nail Polish, is the fabulous presentation. They come in really cute boxes, and are very professionally made. I was already impressed before I even tried them out! Having such cute boxes makes me have more faith in the brand from the get go. The best part is, the polish lives up to the hype! Let me show you these gorgeous glitters!

IMG_0270 IMG_0272 IMG_0276


Up first is Fully Turqued, a clear glitter top coat. Fully Turqued is full of a variety of black and white glitters in all shapes and sizes, and turquoise square glitters. I layered two coats over Milani Cyberspace (see that polish HERE). Fully Turqued has a great formula — it was easy to apply and the glitters came right out of the bottle and onto the nail. I love the look I got while layering Fully Turqued over a holographic polish in a complimentary color! My first thought was to use a sky blue as the base, but the added sparkle added a “wow” factor for sure. I also love square glitter, so the pop of turquoise was my favorite part of this polish!

IMG_0242 IMG_0243 IMG_0244 IMG_0253


Up next is Once Upon a Starry Night. This polish is also a glitter top coat, and is filled with white, blue, and silver glitter. The highlight of this polish is the silver, holographic stars! I added in an extra photograph so you can see how the stars reflect a rainbow of colors in the light. Simply gorgeous! Plus, they were surprisingly easy to get out of the bottle! No fishing for stars here. I layered two coats of Once Upon a Starry Night over L’Oreal Greycian Goddess (see that polish HERE). At first the silver glitters blend in with the background, but they sparkle in the light! If you want more of a “nighttime” feel, I suggest layering Once Upon a Starry Night over a true black.

IMG_0293 IMG_0294 IMG_0296


Last but not least is my favorite polish from the bunch, All Gold Everything. This is a clear glitter top coat filled with gold glitters in all shapes and sizes. I have so many gold glitter polishes that I wasn’t too excited to try this one out, but All Gold Everything is stunning! I layered two coats over LASplash Blowfish Pink, and that was the perfect base color. Many thanks to my Facebook follower Roberta for suggesting a peach as a base! All Gold Everything has a fabulous formula, and I especially love the circle glitters! Overall, I find this manicure to be really fabulous and classy. I’ve even been wearing it for four days now! From now on this will be my go-to gold glitter.

All in all, I love these polishes from I Love Nail Polish! They all have great formulas, and the glitters were really easy to apply. You can shop for these polishes on Etsy HERE and follow on Facebook HERE. Full size bottles are $10 each.

P.S. You can always click on a photo to see it larger and in more detail!


The products in this post were provided for my unbiased review. All opinions are my own. See my Disclosure Policy for more information.

Keeping it Neutral with L’Oreal Greycian Goddess

Happy Friday! Today I have another fabulous and affordable nail polish to show you from the brand L’Oreal. This line of polish can be purchased at drug stores for around $6 per bottle, but I got this one at  a street fair in NYC where all L’Oreal polishes were just three for $5! You can learn more about Street Fair Cosmetics HERE, though they are now closed for the season. Let me show you one of the beautiful polishes I purchased from the fair!


L'Oreal – Greycian Goddess L'Oreal – Greycian Goddess

Greycian Goddess is the perfect grey nail polish with blue undertones. This polish took two coats to be opaque, and had a very good formula. I was impressed with how cleanly and evenly it applied! I also really liked the brush that came with Greycian Goddess. It was very easy to work with due to it’s long bristles that stayed perfectly in place during application. Greycian Goddess is an all-around great polish. Not only is the quality top-notch, but it is a nice neutral shade for winter. Instead of reaching for a tan or nude, next time you want a neutral nail, grab a grey! This shade is perfect for layering as well.

Greycian Goddess is the third polish from the L’Oreal Colour Riche line that I’ve tried. Just like the others, it is fabulous! If you’re looking for a more affordable polish with guaranteed good quality, I highly suggest this line. Plus, they are often on sale! Keep an eye out for coupons in the Sunday paper for added savings.

Geometric Nail Designs

I remember back in high school when my mom bought me my first french manicure kit. Complete with stickers that were supposed to help me create the perfect french nails, this kit turned out to be a flop. Maybe it was my impatience, but after a few tries, I chucked that kit in the trash and never looked back. Thanks to Pinterest and this post from Birchbox, I’m no longer afraid to mix colors. All you need to create a funky, geometric look is scotch tape! 

Last night I painted my nails with Don’t Be Cheesy, a bright orange from the new line Spoiled by Wet n Wild. I let this color dry overnight as Birchbox suggested, since putting scotch tape on wet nails is a no-no. Today I chose one of my favorite nail colors, Check Me Out by L’oreal Paris, and got to work with the tape. I loosely followed Birchbox’s ideas and cut the tape in all different shapes, some small strips and others larger, and placed them on my nails in varying patterns. Once the tape is secure, just paint your nails with the color you have chosen, and carefully peel off the tape while the polish is still wet. Here’s where my main advice comes in: it is important to smooth out the tape so that there are no air bubbles, but make sure you don’t crease it too much. My main problem occurred in peeling off the tape. Since I had pressed it down so much, it broke while I was trying to take it off! Luckily I was able to salvage most of my hard work, but I do have some mistakes (hey, I’m only human). I’m still proud of my new geometric nails, though. Check out the photos below. Image Image

Pretty cool, huh? Just make sure that once the polish is completely dry you use a top coat. Don’t put it on too soon or the colors will smudge. You can also get more adventurous than I did, and paint your nails all different colors. Or, if you want to add a special touch, put clear glitter over the finished product! You’ll soon come to learn that I am a bit obsessed with glitter, but more on that later.